Below we show you how to take a hair sample for a hair strand drug test. This type of drug test is normally carried out by one of our fully qualified company nurses, but it will show you what’s involved.
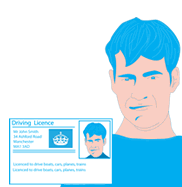
Step one – Checking the persons identity
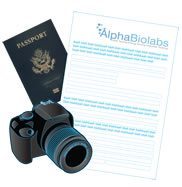
It is very important to check that you have the correct individual from whom you’re taking the sample for. Always ask to two pieces of identification one of them must have a photo.
Good examples of identification are:
- Picture driving license
- Passport
- Picture library card
As a secondary peice of identification you can use a household bill, or a solicitors letter. You will need to take copies of this identification and take a photo of the individual being tested too.
You do this so if you’re called to give evidence in court you can say for sure who you took the hair sample from. It is best practice to take a photographs of the identification and the subject being tested.
Step Two – Taking the hair sample
When taking a hair sample is it always best practice to take the hair from the head. In certain circumstances this may not be possible if the subject has no head hair, so pubic to under arm hair will suffice.
Normally when someone is ordering a drug test they will specify which type of hair is available. Always try to take the hair sample from a place that is discrete and that the individual being tested is happy with you removing hair from that part of the head.
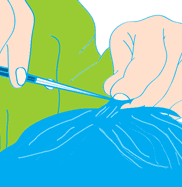
When testing women is much easier if they have long hair. You will need to cut the hair as close to the scalp as possible. About 1cm of thickness or the thickness of an A4 pencil is needed for the test.
This may seem a lot of hair to test, but the length of the hair determines how many months we can test for drugs. This usually means that for every centimeter length of hair collected is one month we can test. For example the subjects hair length is three centimeters long, so we can perform a three months drug test.
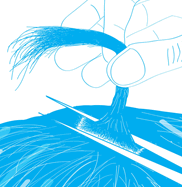
When cutting the hair sample gather together 1cm of hair from the rest – always check with the subject if he/she is happy for you to take the sample from that part of the head. Using your forefinger and thumb gather the hair together and slightly twist the hair together. This will make cutting the hair sample much easier and keep all the hair strand in the same direction.
Try to cut the hair sample as close to the scalp as possible, using one fluid cut. This should give you a uniform cut with a straight edge.
Step Three – Collection of the sample
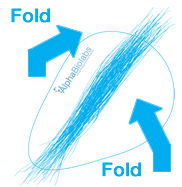
The hair strand sample must be placed flat with the strand running in the correct direction in a sample collection envelope. You must not affix the sample using adhesive tape or glue.
Normally a small amount of foil is used. Place the hair sample in the middle of the foil strip. Be careful not to bend or damage the hair sample. The drop the foil and hair sample in the envelope provided.
This must be sealed with tamper proof strips and signed in the presence of the subject being tested.
Step Four – Completing the paperwork
All the paperwork must be included with the sample. It must be signed by the person taking the test to give their consent to the test taking place.
It also must be signed by the person taking the hair sample. Place the sample envelope in the main envelope with all the documentation and seal with tamper proof seals. Make sure that you include the photographs of all the identification and the test subject.
The envelopes must be delivered to the laboratory by the person taking the samples or by recorded courier service as soon a possible.
 0140 29466
 info@alphabiolabs.ie
 0 Items